Saving money is important to all of us. If you plan your work carefully, have a clear conception of what you are doing, and aren't going to give up halfway through, I'm sure that you can save at least a third of the contractor price for any of the cottages shown in this book. It is possible to save much more. Perhaps that's all the incentive you need.
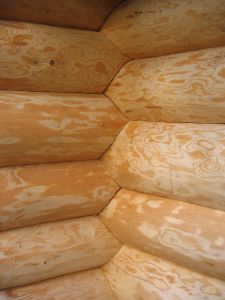
Let's look at the second reason. As with so many other things in life, the real satisfaction is in the doing. If you have never lifted a piece of timber into place or nailed on a stretch of siding, you've missed something. There's real satisfaction in seeing the puzzle go together, in smelling fresh-cut wood, and in feeling the materials that go into your cabin. You'll find yourself inspecting the color and graining of the pieces you are working with. Wood and stone will have new tones and high lights that you never saw before.
As you begin to feel and work with these raw materials, you'll also become more interested in the craftsmanship of putting the materials together. Instead of covering the underside of the roof joists with just any old material to hide them, you'll consider ways of leaving some of the work exposed so that other people will be able to experience some of the enjoyment you have had in working with the various materials.
Possibly you are thinking about the cottage as a low-cost solution to your permanent housing problem or as a retirement home. All the cottages in this book could be used year-round if properly insulated and heated. But a word of caution: The plans shown are minimal. The kitchens are small, the baths are not large, and some plans will require enclosing porches for sleeping areas. Really decide for yourself how you intend to use the various areas. Summer living is different from winter.
Of course, when the job is all done, you'll find much hidden and real enjoyment in telling your friends how you did it. If you earn your living by a sedentary method, you'll probably tell them that you ate like a horse all the time you were doing the work and that you never felt better. The truth is, you will probably have forgotten about the office for the first time in ages and found yourself creating something that you didn't know you could.
Have I persuaded you to do your own cottage? If I haven't, have a local contractor do the job for you - let him be the healthy one! You can always take over, once you see how much fun it is.
Building A Log Cabin
You probably already own the essential ones. These are: hammer, screw driver, saw (crosscut, also ripsaw if possible), plane, bit and brace, chisel, pliers, file, try square, 6-foot rule, level, spatula. If you don't have all of these tools, I'd suggest that you get them.
Those odd jobs that you've been doing around the house have probably made you fairly familiar with the essential tools. But in case you have forgotten here is a quick review of how to use them.
The hammer is used to drive nails, to pull them out, and as a lever. When using the hammer to drive nails, be sure to tap the nail first in order to establish its direction, and then drive the nail home. Hold the hammer near the end of the handle so that you get the maximum force from the swing. When removing nails from finished work, put a block of wood under the head so that the wood is not marred.
Screw drivers come in many sizes and shapes. Have several types in your toolbox.
Saws are used to cut materials. The most common type is the panel saw. Depending on the set of the teeth, saws are usually classified as ripsaws or crosscut saws. You will use these saws to rip or cut most of the wood in your cottage unless you use power equipment.
Planes are used to smooth wood surfaces and to take off excess wood that is too little to be cut with a saw. There are many types of planes, but the two most common ones are the jack plane and the block plane.
The block plane is usually used for short choppy cuts. The plane should be held firmly and a steady pressure should be applied. Unless you are purposely making something concave, don't let up on the pressure near the end of the board - follow through. When cutting across the grain, work from the edges to the middle. Running the plane through will split the end wood.
The brace and various sizes of bits are used to make holes. The brace, a crank-like tool, is usually held at the top by the left hand, the right hand doing the cranking. Unless you have an angular cut, be sure to hold the brace perpendicular to the wood. Wood bits usually have screw ends. There are some exceptions. The screw helps to pull the bit through the wood. If the material being cut is thin, use a backup board to prevent splintering of the wood on the back.
Chisels are used to rout pieces of wood and in making mortises. They come in various widths from 1/8 inch to 2 inches. They may be used in your hands or with a hammer.
Pliers have many uses. They may be used to remove nuts from bolts, to pull out nails, and to hold various materials.
Files are steel tools with many ridges or teeth. They are used to smooth away wood or metal. You'll find them particularly helpful in removing jagged pieces of wood. You can also use them to do the rough sharpening of your tools.
Try squares are helpful in making square cuts of wood. Whenever you have a piece of wood to cut square, don't rely on your eye; use the try square.
The rule is used to measure distances. The 6-foot rule with an adjustable endpiece is particularly good. The sliding adjuster makes it possible to measure tight spots more accurately.
Levels are used to test surfaces for levelness. Use it often; don't trust your eye.
Spatulas are useful in spreading wood fillers and paint. They are helpful when puttying windows.
Shovels are used for digging. The ends taper. Spades have broad square ends.
Pickaxes are used to break ground that is hard. They vary in weight.
Sawhorses provide a place to rest boards or panels for cutting.
Cons Of Year Round Schooling You can do it if you want to. All you need to do is say Ive had enough, lets move to the country. Buy the house, and the rest will come