In Part I of this III Part series, we talked about two cheap upgrades that would improve performance.First, an upper stress bar to improve handling, and second, a cold air intake to improve horsepower and add some growl.In Part II, we’re going to cover some more ground in the world of suspension.After all, you want to get your GTI or Jetta out into some curves… don’t you?If so, you’ll need some quality suspension products to keep you on the road, out of the trees, and away from those pesky guardrails.
One of the two greatest concerns, when it comes to ripping the road, is suspension stiffness.Usually when suspension stiffness is modified, you also tend to modify your center of gravity, otherwise deemed ‘Ride Height’.For about $225.00, a fellow dubber can obtain a set of fine quality H&R Springs.Options include the H&R Sport Springs, which tend to be stiffer than stock, but not absurdly so.The H&R Race Springs, very stiff, and not very comfortable for everyday ride.If you have a Golf or Jetta, then H&R’s Sport Springs are going to make night and day difference alone.If you have a GTI, you already know that the ride can be a bit rough, and going to a set of Race Springs is going to make it a bit worse. A rude awakening for most.For a GTI owner, a set of Sport Springs should do the trick.
Let’s quickly review what’s entailed in a spring replacement.First, you’ll need a set of Craftsman Strut Spring Compressor Tool with Built-In Safety Pins from Sears.They run about $50.00.Now if you’re trying to be scrappy, you can always take these back when done.Just clean them up with a little WD-40 when you’re finished.;)The back is going to be harder than the front in a way, as you’re probably going to have to tear apart some interior.No worries though, it all snaps together/apart.Loosen your lug nuts on the first set of wheels while the car is on the ground.Pop the hood and loosen the strut tower nuts.Place a block or two behind the tires that will remain on the ground.(just in case)Jack one end of the car up one side at a time and place your jack stands under the front cross-member.(this has always worked for me)Pull off the first wheel, and remove bolts according to the Bentley Manual for your Golf or Jetta.Shimmy that strut out of there as a whole unit.
Once the strut is on the ground, go ahead and use the Strut Spring Compressor Tool to get the spring compressed.Be sure to keep the sides as even as possible!Once you feel you’ve gotten the spring compressed, unscrew the nut at the top of the strut tower.Everything should come apart relatively easily.Slide your existing spring off, and slide the new lower and stiffer springs on. You may not even need to compress the new springs when putting everything back together.When done, slide the entire strut back into place, and follow the above steps in reverse order.Voila!One down, three more to go!
The second largest concern in tearing through turns is, making sure the car doesn’t sway in corners.Flailing, swaying, body-roll, etc. can all lead to disaster when cornering hard.The objective is to keep the car from shifting as much as possible when turning.There’s a great deal of expensive hardware in existence to help this out, but let’s stay focused on the cheap, but effective items.The cheap solution? An Eibach Sway Bar & Anti-Roll Kit!Price?Ballpark cost is around $350.00, shipped.The heavier gauge steel used in these sway bars is significant improvement over the stock sway bars.Yes, you have existing sway bars, but they’re weak.Thus, the recommended upgrade.
Let’s quickly review the install process for your Eibach Sway Bar & Anti-Roll Kit.Pick the front or back of the car to start.Place a block or two behind the tires that will remain on the ground.(just in case)Jack one end of the car up one side at a time and place your jack stands under the front cross-member.(this has always worked for me)Get some light under the car and look for the stock sway bar.Locate the nuts/bolts that hold it in place, and begin to loosen them.You may need an allen wrench and a box wrench in order to remove the existing sway bar. You’ll understand this when you see it.Once bolts are removed, go ahead andfinagle the bar out from underneath the car.Repeat these steps in reverse in order to get the new sway bar in place.Drop some grease on those bushings.Rinse, lather, repeat for other end of car.Thanks Eibach!
For the average driver, these two upgrades combined provide substantial improvement over the original equipment.Combine them with the two upgrades in Part I of this series, and you will find your car riding on rails like you were riding a roller coaster.
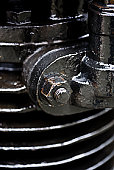
Air Cooled Vw Performance
Answer:
Routine Maintenance for Air-Cooled Reciprocating Compressors
Every 8 Hours (or Daily)
• Maintain lubricant level between high- and low-level marks on bayonet gauge. (Discoloration or a higher lubricant level reading may indicate the presence of condensed liquids). If lubricant is contaminated, drain and replace.
• Drain receiver tank, drop legs and traps in the distribution system.
• Give compressor an overall visual inspection and be sure safety guards are in place.
• Check for any unusual noise or vibration.
• Check lubricant pressure on pressure lubricated units. Maintain 18 to 20 psig when compressor is at operating pressure and temperature. High-pressure rated compressors should maintain 22 to 25 psig of lubricant pressure.
• Check for lubricant leaks.
Every 40 Hours (or Weekly)
• Be certain pressure relief valves are working.
• Clean the cooling surfaces of the intercooler and compressor.
• Check the compressor for air leaks.
• Check the compressed air distribution system for leaks.
• Inspect lubricant for contamination and change if necessary.
• Clean or replace the air intake filter. Check more often under humid or dusty conditions.
Every 160 Hours (or Monthly)
• Check belt tension.
Every 500 Hours (or 3 Months)
• Change lubricant (more frequently in harsher environments).
• Check lubricant filter on pressure lubricated units (more frequently in harsher environments).
• Torque pulley-clamp screws or jam-nut.
Every 1,000 Hours (or 6 Months)
• When synthetic lubricant is used, lubricant change intervals may be extended to every 1,000 hours or every 6 months, whichever occurs first (change more frequently in harsher conditions).
• Inspect compressor valves for leakage and/or carbon build-up. The lubricant sump strainer screen inside the crankcase of pressure-lubricated models should be thoroughly cleaned with a safety solvent during every lubricant change. If excessive sludge build-up exists inside the crankcase, clean the inside of the crankcase as well as the screen. Never use a flammable or toxic solvent for cleaning. Always use a safety solvent and follow the directions provided.
Every 2,000 Hours (or 12 Months)
• Inspect the pressure switch diaphragm and contacts.
Inspect the contact points in the motor starter.
Lubrication
Compressors may be shipped without lubricant in the crankcase. Before starting the compressor, add enough lubricant to the crankcase to register between the high and low marks on the dipstick or on bull’s eye sight gauge. Use the specified lubricant or consult the manufacturer for recommendations.
Certain synthetic lubricants have proven under extensive testing to minimize friction and wear, limit lubricant carryover, and reduce carbon and varnish deposits. They will support the performance characteristics and life and are highly recommended.
Refer to the manufacturer’s specifications to determine the correct amount of lubricant and viscosity to use for your model and application. Use the supplier’s lubricant analysis program.
Both Bill Weston & Mary Mcguire are contributors for EditorialToday. The above articles have been edited for relevancy and timeliness. All write-ups, reviews, tips and guides published by EditorialToday.com and its partners or affiliates are for informational purposes only. They should not be used for any legal or any other type of advice. We do not endorse any author, contributor, writer or article posted by our team.
Bill Weston has sinced written about articles on various topics from Car Parts, Cars and Car Parts. Bill writes articles for automotive sites all around the Internet. VW Auto Parts is one of his specialties. Make sure you get the best upgrades for your Volkswagen!. Bill Weston's top article generates over 2400 views. Bookmark Bill Weston to your Favourites.
Mary Mcguire has sinced written about articles on various topics from Car Parts. *SOURCE: Improving Compressed Air System Performance: A Sourcebook for Industry is a cooperative effort of the U.S. Department of Energy’s Office of Energy Efficiency and Renewable Energy (EERE) Best Practices and the Compressed Air Challenge®.. Mary Mcguire's top article generates over 1600 views. Bookmark Mary Mcguire to your Favourites.
Design Your Home Page All three of these elements should be included as part of the initial plan of the web site with both the owner and the web designer giving much consideration to the points in question. Always think o...